Showing posts with label Kid-Approved. Show all posts

Sunday, October 19, 2014

Mamma's Pakkaavada (Ribbon Pakoras) Deepawali Faraal 1/5

My Mom makes these beauties only on two or three occasions every year. One is for Diwali and the other is for Onam. The third time is whenever we bed, plead and bribe her to make some. But the reason why she doesn't make these on a regular basis is--- us! We eat it up! We gobble these up before the day is over and with her health issues, no matter how many hours she puts on these- roasting, kneading, squeezing them out and standing long hours frying them in hot oil - its all gone within hours, irrespective of how much she makes. I used to be clueless, when she used to be mad about the big dabba (container) being empty at tea time...but now I know! It doesn't last in my house either. :-D
Love You Mom! <3

Indian Kitchen Press with its various discs. Similar to a cookie press, but used for deep fried savories.


Ingredients:-1 cup rice flour
2 cups besan (gram flour)
Salt to taste
1 tbsp kashmiri red chilli powder
1 tsp onion powder (*this ingredient makes all the difference*)
1 tsp asafoetida (hing)
1 tsp white sesame seeds
1 tbsp coconut oil
Water- enough to make a smooth dough (approximately 2 cups, but you wont need it all)

Oil- to fry

Pakkaavada Disc used to make ribbon pakoras.


Method:-Dry roast the rice flour and besan separately. Let them cool, mix them together.
Boil 2 cups of water. Take one cup and dissolve the salt, chilli powder, onion powder, and hing in it. Now make a well in the center of the flour mixture and pour the coconut oil in the center. Onto the coconut oil, pour the cup of water with spices and stir with a wooden spoon. Cover with a lid and leave for 10 minutes.
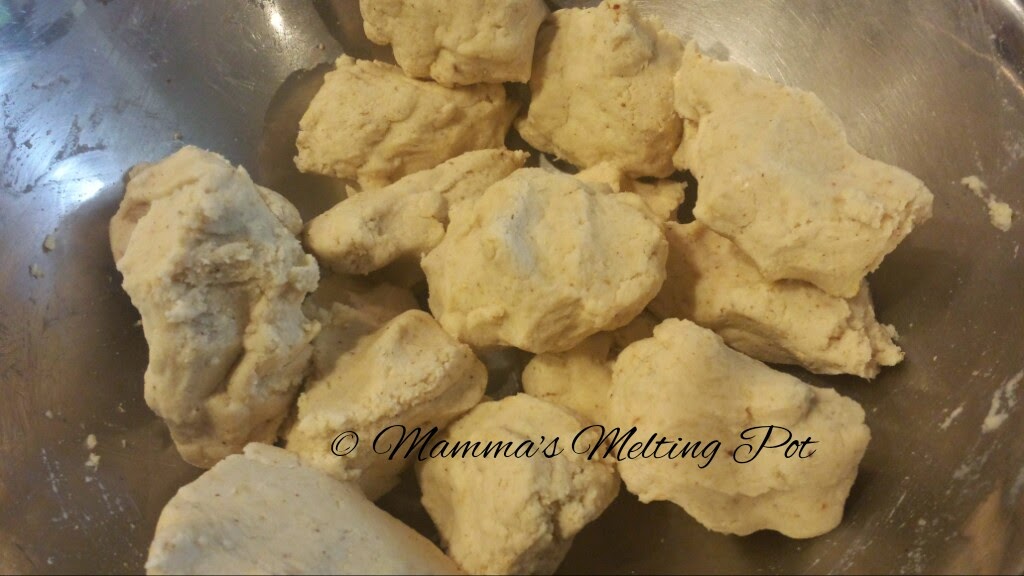
After 10  minutes, using the remaining water as needed, knead the dough into a stiff but pliable dough. Spread a tsp of coconut oil in your hands and pat the dough. Divide the dough into balls sized approximately to fit into the barrel of your Kitchen Press. Brushing the insides of the barrel and the contact points of the press is also a good idea. It makes the cleanup later, a breeze!


Now use the ribbon pakoda disc inside the barrel and squeeze out the ribbons directly on to hot oil. Do not overcrowd.
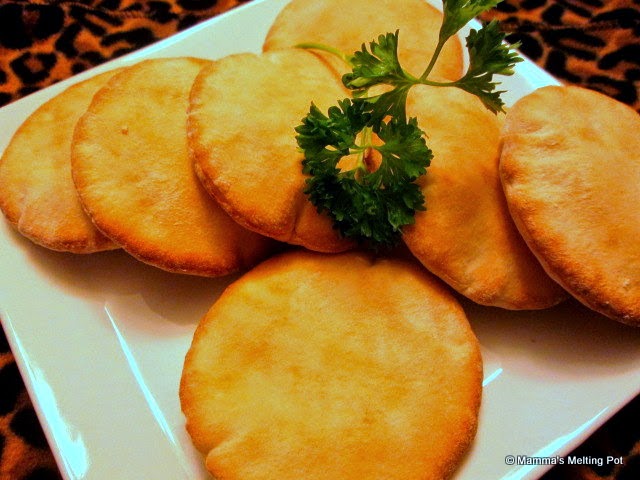
Deep fry both sides on medium heat until bubbles are very few and the pakoda is crunchy and golden brown.


Drain on paper towels.
Store the completely cooled pakkavadas in air tight containers, and serve with tea.
Enjoy!


Saturday, October 18, 2014

Mamma's Rava-Coconut Laddoos - Deepawali Faraal 3/5

Sweet and chewy, these are my very own recipe painfully developed by trial and error, over the last two Diwalis, with the inclusion of sweetened baking coconut, instead of freshly grated coconut, so that they could have a longer shelf life. The only sad part is that after all that trouble that we go through to make these, they don't last more than 3-4 days in our house.


Ingredients:
4 cups fine rava (semolina)
10 oz sweetened coconut flakes
1/2 cup  ghee (clarified butter)
1.5 cups sugar
1.5 cup water
1 fat pinch of saffron strands
2 tsp cardamom powder
Raisins as needed (Golden green raisins recommended)


Method:
In a heavy bottomed pan, melt the ghee. Into this add the rava and stirring constantly, roast it until the rava turns a light pink and glossy. It should be around 7-8 minutes. Switch off the fire and stir in the coconut flakes and cardamom powder.

Let the rava coconut mixture cool.

Now in another pan, boil 1.5  cups of water and throw in the strands of saffron. Stir in the sugar and bring it to a boil. Boil for a few minutes until the syrup turns thick into 1 string consistency. 1 string consistency is when you spread a drop of the syrup between your index finger and thumb-tip and it should form a string when you touch and separate them.

Now, pour this hot syrup into the rava coconut mixture. Stir well and let cool slightly. Now, with clean hands, mix them all together and form uniform balls out of them, carefully embedding one or two raisins on each laddoo.

Repeat the process with all the laddoos and let them cool down completely.

Now if you are working with a large batch, chances are that the mixture will dry out about 3/4th way into the laddoo rolling. In that case, don't panic and add 1 tsp of hot milk into the mix, knead lightly and continue making laddoos. but don't add too much as that can make your laddoos crumble or become too soft. Refrigerate in an air tight container, and it should last up to a month.

Making them last that long....that is another story. Enjoy!! 


Sunday, October 5, 2014

Savory Oats Uttappa

When people say Oats and Milk, I am one of those people who mentally gag. No offense to anyone, but I just cant eat sweetened oats. It could be the texture or it could be the idea of a sweet dish early in the morning, but I just dont do Oats and fruits/Milk. Period!
Over the past few years, Oats became center staged as a health food,but I wasn't sold. I have always believed most whole grains with bran can be equally or even more healthier. But my Ma and Pa in law absolutely adore Oats. They can eat it three times a day in any form. They both suffer from Diabetes and prefer Oats, rather than eating rice. But they were out of ideas soon and it was while cooking for my diabetic in-laws, and trying out healthy, no-other-carb-added, nutritious recipes I discovered what a joy it is to cook savory oats recipes.
And as an added bonus, I started enjoying my savory Oats creations too!
Now, Oats and I are on much better terms. (wink!)


Here is the proof: Oats Veggie Uttappa :-)
Ingredients: -
For the batter:-
1 cup thick yogurt
2 inch piece of ginger
1 cup milk
2 cups Oats (I used old fashioned rolled oats)
2 peeled fat carrots
1 sprig curry leaves
1 tsp salt or to taste
1/2 tsp turmeric
1 tbsp cumin seeds
1 tsp sugar

For stirring in (texture):-
1/4 cup rolled oats
1/2 cup finely chopped cabbage
1 cup chopped french beans


Method:-
In your blender, blend all the batter ingredients until smooth. Now to the batter, add oats, the finely chopped cabbage and  chopped french beans. Keep aside for 20 minutes to soak. 

Check salt and consistency of batter. Add some more milk to get the right thickness.
In a pan, spread 1tsp of oil/ butter and pour 3 small uttappas. Do not spread. Cover with a lid. Cook on low for about 3 minutes. Remove lid, flip and let the other side cook. Serve hot with sambar/chutney/ as is. Enjoy!!! 


Tuesday, September 23, 2014

Mexican Tamales

My obsession over International cuisines continue as I take a quick stop at Mexico.

According to the Wikipedia, "A tamale is a traditional Meso-American dish made of Masa (a starchy dough, usually corn-based), which is steamed or boiled in a leaf wrapper. The wrapping is discarded before eating. Tamales can be filled with meats, cheeses, fruits, vegetables, chilies or any preparation according to taste, and both the filling and the cooking liquid may be seasoned."

I wanted it to be as authentic as it could be. So I stuck to the original recipe and seasonings as much as I could. But catering to Indian and American households, I have also provided the substitutions wherever possible.


My Tamales are made with a basic Corn Masa Flourand not the powdery-fine, corn flour/ corn starch that is commonly found and is used as a thickening agent in soups and gravies. Try to find a flour with a high fiber content to keep them nutritious and healthy.
This is a pretty straight forward recipe and feel free to add your own twists and customization.

Here it goes:

Step 1- Filling:- 
First we start with the filling. I had some leftover rotisserie chicken from Costco which I deboned and chopped up fine. Here is the spice mix you can use to cook your choice of chicken, pork, ground beef or beans, depending on your preference.
1 lb or approximately 1/2 kg of partially cooked black and kidney beans/chicken/pork/ground beef
3 dried Pasilla chili (Substitution: Chipotle or Paprika powder ~2 tbsp, soaked in 1/4 cup warm water)
1 tbsp Corn oil
1 tbsp garlic paste or 1 tsp garlic powder
1 tsp onion powder
1 tsp roasted cumin powder
1 cup water
Salt to taste


In a sauce pan, heat the oil and saute the garlic paste if you are using it for a minute, then add the protein that you are using. Now add all the remaining ingredients and stir well to combine. Bring to a boil and simmer gently, on low for 1 hour. (If you are using raw beans, you could use a pressure cooker to cook it in the same mixture.) The goal is to get the spice into the meat or beans and make it really tender.
Once the water thickens up stir gently and remove the lid and make it mostly dry.
Keep it aside.

Step 2: Readying the Corn Husks:-16 Corn husks or Tamale leaves  (you could use banana leaves, which are also used traditionally to make tamales)
1 lemon


This is simple. Boil a large pot of water, then squeeze the juice of a lemon into it. Soak the leaves/ husk into this water and let soak for 10-15 mins. After 15 minutes drain them well. This step removes small bugs or germs from the leaves and also softens the leaves so that they become more pliable.
Keep aside.

Step 3: Making the Masa or the corn dough mixture for the Tamales:-
2 cups Masa or whole corn flour
1 tsp baking powder
Salt to taste
1/2 cup lard/ butter or corn oil (I used oil though lard is preferred)
2 cups of vegetable/chicken stock or water


Stir together the flour, salt and baking powder well. Then using clean hands, knead in the butter/lard or oil that you are using. Lastly use the stock or water and knead it into a soft and  slightly sticky dough. It should be spreadable by a spoon.
Keep aside.


Step 3: The Assembling of a Tamale
Take a drained Corn husk, and using a spoon, spread a thin layer of Masa batter on the smooth side of  the husk, leaving a little space on the top and bottom.
In this, at the center put a small or large amount of filling, but always just enough to get coated by the Masa batter from all sides. The mixture must be enclosed, in the Masa.
Now gather the top and bottom ends and gently press along (from outside) the seams to seal the mixture in, and using a chef's cord or a thin strip of corn husk, securely tie the ends, holding the shape.


Step 4: To cook the Tamales:

In a large lidded pot, add about 1/3 part of water. Then using an inverted bowl, elevate and place a steamer to keep the tamales out of water. Stack the tamales carefully and cover with lid. Steam for an hour. Let cool for 10 minutes.


Step 5: Serving Suggestions:


These flavorful goodies can be eaten as is, after peeling off the husk. But you may also serve them with Salsa, hot sauce and Sour cream on the side.
I served mine with a dollop each of Sriracha and Sour Cream. 


Enjoy! :-)


Saturday, July 12, 2014

Mamma's Perfect Choco-Chip Cookies

Chocolate chip cookies are something of a habit here, in my house. Kids expect me to make it every couple of months and keep our humongous cookie jar filled, and I do that gladly. There is a reason, why I do it gladly- it has to do something with one big change we made when we could, to a better, healthier lifestyle.

It was not always like this. There used to be a time when I was scared of baking. Once my son got to the toddler stage was when I started paying more attention to the packaging labels and noticed the tough-to-pronounce ingredients there. We stopped buying them altogether. But how would you explain your refusal to buy packaged cookies to a toddler who absolutely loved his "chokochikookie???"

Introducing... my Chef Guy. Read more about how I met him in my next post! :-)

I had to give him a healthier option. I'd watch the food channels where baking cookies were what they did between basting the roast. I would hear it from the Moms at the park, how they baked a batch and they binged on it because it was so good when it was warm. I wondered, was it that easy? If it was that easy, why am I not making it for my poor kid suffering from choco-chip cookie withdrawal?

The answer lay in my cold, cold feet. So I dragged my feet up and down the baking isle of our local Publix and got all the ingredients mentioned in my favorite recipe. It was nerve-wracking to pick up even flour. Enriched, unbleached, self raising, whole wheat, healthy blend and so on. After pissing off hubby (who hates shopping) and 2 and a half tantrum from his son later, I finally settled on an enriched, unbleached all purpose flour and walked out of the store.


At home, I laid out the ingredients in  neat order on the counter. I gingerly followed the directions to the T and creamed and mixed and stirred and folded. I sent a silent prayer heavenward before thrusting the cookie sheets in the oven. And twelve minutes later came out my first creation from the world of cookies. I am strictly not a cookie or cake person. 1 sliver of a slice and 2 cookies are the max I can stand in a day. So it wasnt until S had 6 and sonny boy grabbed the third one,I decided to take a bite and see how it tasted. I took a bite...it was warm, the chocolate chips were gooey and filled my mouth with sweet warmth. The cookies were perfectly soft and chewy, but as I swallowed, the unmistakable tightness in my throat, that comes from too much sweetness, made me freeze, in my tracks. I put down the cookie and immediately knew I had to improvise.


The next day, using the leftovers and tweaking the recipe,I made my second batch. This time, I tasted it first. It was perfect! Just perfect!
That incident was 9 years back. To this day, I haven't changed my recipe.
Today, I have 4 kids in the house, 2 mine and 2 my son's best friends. Its almost 1.30 a.m. and they are laughing, watching some goofy kids movie and playing and talking as if its the middle of the day. Right between the circle is a plate full of the same cookies and I take to the side table a huge jug of lemonade. My son takes a cookie and takes a bite and unplanned, his eyes meet mine and he smiles and winks at me- a natural reflex for him. That smile creates the memories of that toddler drooling and munching on his chokochikookie and I beam back with a wink.


And I am sitting here, in the kitchen listening to their laughs and typing out this recipe. It is an odd time, but maybe the time to write this recipe down, cant get any better. :-)
(Makes about 2 dozen cookies, depending on your cookie size. These are about he size of your palm, sans the fingers. Does that make sense?)


Ingredients:-3/4 cup (1 1/2 stick) sweet cream butter, softened at room temperature
1/2 cup sugar
1/2 cup packed brown sugar
2 large fresh eggs
2 tsp tsp vanilla extract
1 tsp baking soda
1 tsp salt
2 cups all-purpose flour
2 cups semi-sweet /milk chocolate Chips


Method:
Preheat oven 350°F.
Cream together the butter, sugar and brown sugar until smooth in a mixing bowl, using an electric mixer.
To this add the eggs and vanilla and beat until incorporated into the sugar butter mix.
In another large bowl, stir the flour, salt and baking soda, very well.
Make a well in the center and slowly add the wet mix into the flour mix. Carefully combine them using the electric mixer until a very sticky and soft batter if formed.
Now, using a wooden spoon or spatula, stir in the two cups of chocolate chips
Line 2 baking sheets with parchment paper. Drop 1 tbsp of the batter into the pan, leaving about 1 1/2 inch of space. these cookies spread beautifully. if you dont leave that space, you will end up with a single sheet of cookie instead of the separate ones. 9 is perfect number for a standard cookie sheet.
Bake at 350°F for 10 minutes. If you want chewier ones, bake an additional 2 more minutes.
Cool them in the pan for 5 minutes and using a thin spatula lift them off the parchment and cool them on a cookie rack.
My family says skip the rack and grab them right off the pan. Either way, enjoy them with a cup of cold milk. Enjoy! 


Friday, July 11, 2014

Mamma's Savory French Toast


Hey Peeps,
Its been almost 6 months now, that I joined Chef at Large and found myself in the middle of World Class Foodies, who are just as crazy as me when it comes to food. It was here that I met Sonal G. She is one of the most talented and creative bloggers I have come across. She not only became a very good friend, but also mentored me on the finer aspects of blogging and cooking. She never fails to amaze me with her huge collection of recipes that is every bit amazing and unique as her.

Her blog "Simply Vegetarian 777" has a dedicated number of followers who stay tuned in to the yummy vegetarian posts she churns out systematically.

I adore her and always tune in to her blog, so it came as a very pleasant surprise when she asked me to feature in a Guest post in her blog. I accepted in a heart beat! Thank you Sonal. I am honoured! :-)

Now, I am a staunch non vegetarian who goes cranky if I dont get my animal protein. I need some meat or fish or eggs on a daily basis in a very small portion. Au contraire, Sonal's blog features vegetarian recipes which are her forte. I couldn't think of anything vegetarian that Sonal hasn't attempted on her blog. But she graciously let me use eggs in my recipe, and I made her some French Toast but, with a twist.

Savory French Toast: A french toast made without all that sugar, but absolutely yummy.


You can visit my Guest post and get this recipe here. Please visit,try and do let me know how you find my recipe. xoxo

--Mamma


Saturday, June 14, 2014

Mamma's Stuffed Bruns


Sometimes there are certain dishes, that you want to make since a long time, but doesnt. Not because you cant make it, but because you have never seen it made. For me that dish was Paav aka Bombay buns.
There are countless bakers in the small, narrow streets of Mumbai who wake up before the sun does, knead, bake and sell these delicious, simple staples to stores or door to door, fresh and steaming hot.  They offered a variety of fresh baked goodies from a few different kind of paavs, doughnuts (not the American kind, but a soft long roll stuffed with creamy icing), pizza bases and cake rusks.
The Brun Paav aka crusty roll was one of my most favorite items among them. Brun paavs sold those days around 50 paise per roll. The seller was an old man we called Babu. His family made and sold paav for years and Babu was the second generation in this business and he brought them out to sell in his trusty cycle, hanging hot from burlap bags filled to the brim. Now, these burlap bags attached to the handlebars of his cycle. It was an actual art trying to not hit his knees on the steaming bags, and burn his skin. he would pedal his cycle with a lean on either side and knees turning away from the cycle which was pretty much pedalling with his heels. It was quite a sight, watching him ride his cycle in the mornings with a full load, which gave us kids something to be amused at.
Without fail, Babu arrived at 6.15 a.m. every morning. We brought hot "kadak paav" as it was called, at 2 for a rupee, Babu, carefully wrapping it in a piece of pre-cut newspaper piece, so that us kids didnt burn our hand. Mom would have boiled the milk and cooled it down byt hen for us. We would tear off pieces off the paav, dip it into our milk and eat it with relish. The salty, soft interiors and the chewy crust sweetening as we chewed was quite the experience. May God bless that sweet guy!
To replicate this experience, I would always wait to go back to India, sometimes two to three years so that I could catch up on all the flavors I grew up with Brun Paav always remained an item on that list.
Now switching back to the present, I finally found a fail-proof Brun paav recipe from a fellow Mumbaiite and blogger, Shailja Tomar Gonsalves, and under her mentoring recreated the same magical taste in my own kitchen. And its a keeper!
Now, after making three batches of Brun Paav in 4 days, I had to experiment. And this recipe is the result of that curiosity. How do you make a perfect recipe, perfect? Stuff it up with spiced meat!
presenting my Stuffed Bruns...and I dedicate my post to the amazing Shailja, without whom I would still be waiting for my India trip to enjoy my Brun paav! 


 Ingredients:-
Bruns: 
4 cups all purpose flour
2 tbsp yeast ( I used active dry yeast)
1 tbsp sugar
1 tsp salt
2 tbsp melted butter
Warm water + 1 tsp sugar to bloom the yeast
Warm water -as needed to knead
3 tbsp milk - to brush the buns


Filling:
1 lb ground meat ( beef or mutton)
1 tbsp minced ginger
1 tbsp minced garlic
1 tbsp chopped green chillies
1 sprig tender curry leaves, chopped
2 tbsp chopped coriander leaves
1 tsp ground garam masala made from  fennel seeds, green cardamom, star anise, cinnamon, and cloves.
1 large onion, thinly sliced
1 tsp coriander powder
1 tsp chilli powder
1/2 tsp turmeric powder
2 tbsp of the rendered fat from browning the meat or 2 tbsp of your favorite oil
Salt as needed


Method:-
1. In 1/2 cup warm water stir in 1 tsp of sugar, and then stir in 2 tbsp yeast. Leave it aside to bloom for about 10 minutes. At the end of 10 minutes, it should be frothy.

2. Stir together the flour, butter, sugar and salt well until combined and make a well. Into this well, add the bloomed yeast mixture. Incorporate it into the flour as much as possible. Now, use the warm water and knead the dough into a soft, lightly sticky dough. You can use a mechanical mixer or use your hands. Pour a little oil in your palms and pat it all over the kneaded dough and leave it covered with a tight fitting lid, in a warm place to rise, for an hour.


3. In a pan, brown the ground meat with a little salt and pepper. Drain the meat, once browned, reserve for later. If you dont care for the Saturated fats, use that fat to saute the onions. If not, use 2 tbsp of oil and saute the onions. When they turn soft and translucent, add the minced garlic, ginger, green chillies and chopped curry leaves, and saute well until tender and aromatic. Now reintroduce the reserved ground meat and add all the dry spices and stir well.Cover and cook for  about 15 minutes on low heat until all the spices are incorporated into the meat. Switch off the heat, stir in the chopped coriander leaves and let it cool.

4. Meanwhile, check on the dough. It should have doubled in size. Roll it by hand, on a floured surface into a cylindrical shape. Now using a knife, divide and cut into 12 pieces. Roll the 12 pieces into rounds. Leave in a pan, covered to rise for 45 minutes. It should rise and double again. Even if it did not, at the end of 45 minutes, you can still move on to the next step. 

5. Preheat the oven to 450°F.


6. Grease your palms lightly. Take each round and make a well. Divide the meat mixture into 12 parts and stuff one part inside the dough well. Gather the edges on the top, and lightly twist and press it on to the top and gently roll the stuffed roll to form a ball.
Keep the ball on a lightly greased baking pan. 
Now, repeat the steps until all the meat mixture and dough is used up.


7. Brush the stuffed rolls with a little milk all over. Place an oven safe pan with 1 cup hot water on the bottom shelf to make the crust chewy. Now bake in the preheated oven for 20-25 minutes until the top of the buns are lightly reddish brown and hard when tapped.


8. When done, cool off in a bread basket, on top of a clean towel.


Serve them warm with tea for breakfast or as a filling snack.


Enjoy!!!


Friday, June 6, 2014

Easy Peasy Doughnut Holes

This recipe came to me when I told one of my American friends Sherry R,  how I ended up craving doughnut holes throughout my pregnancy, but always after my dinner, and how insane it was to send my poor hubby out on a doughnut run. Ok, I have done it in my hormone driven craziness, but more than 3 times a week? That was the insane part! Buying it and freezing it seemed like a good option until I tried to defrost it. The soggy, sticky, lifeless thing did not resemble like the dreamy glazed puffed up beauties I was craving in the first place. That was when I decided to up my standards and make my own hot, fresh doughnut holes.
And for the ones who still wonder what doughnut holes are, they are small, round, bite-sized doughnuts that the Doughnut chains claim are the bi-product of making doughnuts. I don't buy that! I believe these babies are better than real doughnuts, due to their amazing "poppability" and portion control and they need to be giver a better name than doughnut holes, which sounds like you-know-what, a term for mean people.
So here is my version of Doughnut holes, which my dear friend Sherry and I, both have adapted, because it is so much more better than its Vegan version, which we tried recreating in those early experimenting days.
This recipe makes 12 poppers.


Ingredients

2 tablespoons butter
2 tbsp granulated sugar
1 egg
4 tablespoons buttermilk or milk
1 cup all-purpose flour
1 1/2 tsp baking powder
1/2 teaspoon salt
1/2 teaspoon vanilla extract
Confectioner's sugar (optional)

Doughnut holes, rolled in confectioners sugar, while still hot.


Method:-
Cream together the butter, sugar and milk. 
Then add the egg and beat lightly until combined well. When combined, add the vanilla and stir well.
Sift together flour, baking powder, and salt.
Make a well in the center of the dry flour mixture and pour the egg mixture in. Stir gently. Do not overmix.
In a cast iron or enamel frying pan, heat oil until approximately 350 - 375 degree Fahrenheit.
Drop spoonfuls of the batter in the hot oil. Some balls might turn over on their own as the bottom gets cooked and they puff up. If not turning over on its own, help a little using a fork or spoon.
Fry until its golden brown all over.
Remove from oil, drain well and roll in powdered sugar or enjoy as is.
Goes perfect with Coffee and Tea.

Monday, May 19, 2014

Mamma's Tomato Mini-Pies (Pictorial)

These pies are a result of my switching over to a much healthier lifestyle, ironically. I used to buy refrigerated pie dough for my pies and had a few boxes of them left. I had to find a way to get rid of them soon, before i switched over to a homemade crust and no more processed stuff from the grocers.
I call these stuffed, baked, savory goodies mini-pies, purely because I don't know what else to call them and also because they are made from Pie crust. The tomatoes I used for these are fresh beefsteak tomatoes. Its kind of important to prep your tomatoes before baking, if you don't want your pies to be soggy.
The stuffing can be really versatile. This recipe used a onion-chive-cream cheese topping on the tomatoes. But I have also used Basil Pesto and toasted Pine-nuts on top of the tomatoes, in the past and they were quite yummy too. Other ideas also include Pepperoni and Fresh Mozzarella, Spinach and Goat cheese and Mushrooms and Ground Beef sauteed with Ginger and Garlic. (Oh yeah! So many possibilities!)
These make amazing appetizers or a delicious brunch/breakfast item, as well. This recipe makes 6 mini pies.


So without much ado, here goes:

Ingredients:-
1 pk refrigerated pie crust (2 sheets)
3 tbsp finely chopped fresh chives
3 tbsp finely chopped green onions
1 8-oz pk of Cream Cheese/ Neufchatel Cheese (softened)
1/4 cup Parmesan, grated
2 large beefsteak tomatoes
Salt and Pepper
1 egg- for egg wash (make egg wash by beating lightly 1 tsp of water with one egg)
1 tbsp Nigella seeds (for sprinkling on top of egg wash)

1 cup or bowl that is slightly wider than the beefsteak tomato slices in circumference

Method:-Slice each beefsteak tomatoes into 3 thick slices (excluding the top-most and the bottom slices. make the top and bottom slices thin so that you will have 3 thick, uniform slices that sit flat.) Now, place the slices in single layer on paper towels, and sprinkle salt on top and bottom of each slice. Leave for 15 minutes on each side to drain maximum liquid out of them. Change paper towels if needed.
Bring the pie crust to room temperature.

Preheat oven to 425 degree Fahrenheit.

Mix together the chives, onions, cheese and cream cheese together adding a little salt and pepper to taste.Use a single beater of a hand mixer or use a fork. Using a stand mixer is not recommended.

Flour a rolling surface and gently spread out a pie crust sheet on it. Roll out gently with a floured rolling pin until smooth and rectangular, about 1/2 inch thick.

Repeat with the other sheet and make sure they are uniformly sized, though not necessary to be accurate.
On one sheet, place the 6 prepped tomato slices, uniformly spaced (at least 2 inches of space between each). Sprinkle ground pepper on top.


Divide and spoon the cream cheese mixture  on top of the tomato slices.


Now brush egg wash, all over the exposed parts of the loaded pie crust. Cover the first loaded pie crust sheet, with the other sheet of pie crust and press down gently so that it sticks to the bottom sheet of crust.


Now, carefully using the cup/bowl/glass cut around the tomato slices to get mini-pies that are slightly larger than the tomato slice.


 You may crimp the edges of the pie using a fork if they are threatening to come apart.


Carefully, lift each mini pie and place them on a parchment lined cookie sheet.


Cut a small vent on top of each pie, brush with egg wash, sprinkle a few nigella seeds and bake them at 425 degree Fahrenheit for 30-40 minutes, or until the tops become a light golden brown and lightly crack.


Now, let them cool slightly as the filling can be hotter than the exterior.


Serve them as a snack/appetizer or as a yummy main course with a soup and salad on the side. Enjoy!


Monday, May 5, 2014

Falafels - A yummy Vegetarian Treat from the Middle East.


Falafel is a deep-fried ball or patty made from ground chickpeas, fava beans, or both. Falafel is a traditional Middle Eastern food, usually served in a pita, which acts as a pocket, or wrapped in a flatbread known as lafa. The falafel balls are topped with salads, pickled vegetables, hot sauce, and drizzled with tahini-based sauces. Falafel balls may also be eaten alone as a snack or served as part of ameze (appetizers). (quoted from Wikipedia)


I have been wanting to try making thee for a long time now. Finally last Friday, I decided to go with my Middle East dinner theme and make these for my family. I bought some cute-looking Mini Pitas from the local grocers' and picked up some fresh herbs and feta. The rest I had in my pantry.
You wont believe how simple these are, to make once you have everything prepped.
So here goes the recipe:

Falafel Patties:- (makes ~30 patties)

Ingredients:
 2 cups soaked chickpeas, soaked one full day and night
Oil, for frying
3 tablespoon olive oil
5-6 cloves minced garlic

1 whole bunch green onions (white and green part) finely chopped
1/4 cup chopped fresh parsley leaves
1/4 cup  chopped fresh mint leaves
1/4 cup  chopped fresh coriander leaves
1 lemon's juice
2 teaspoons cumin powder
3 teaspoons coriander powder
salt, to taste
Freshly ground black pepper


Method:
Drain the water used to soak chickpeas, then rinse well. Drain the chickpeas very well.
Using a food processor, pulse the garlic, drained chickpeas, green onions, parsley, mint, cilantro, lemon juice, cumin, coriander, salt and pepper together. Add 3 tbsp of olive oil while pulsing. Pulse until the mixture is finely ground and a little fluffy.
Using damp hands, form tiny golf ball sized balls and press lightly to form a patty.
Traditional falafels are made into ball shape. I made them into patties because, personally I feel they cook much better that way, especially since I am using raw soaked chickpeas and not cooked chickpeas from a can.
Heat about 3 inches of oil in a cast iron pan or fry pan. Repeat with the rest of the patty mixture, to form patties.
Over medium heat, fry the patties to a golden brown. High heat is not advised as the insides may not get cooked, leaving the outsides too browned.
When evenly golden brown, take the patties out of the oil and drain on paper towels.
Keep aside.

For the Yogurt Sauce:
1 cup greek yogurt
1 tbsp lemon zest
1 tbsp tahini paste (or pulse 1/4 cup soaked sesame seeds with 2-3 cloves of garlic and a tbsp of sesame oil and make your own)
1 tsp cayenne pepper
Salt and pepper - to taste
1 tbsp minced mint and parsley
1 whole cucumber, grated


Method:-
Add everything to a blender except the mint, parsley and cucumber and pulse until smooth. Stir in the cucumber, mint and parsley, cover with a cling wrap and refrigerate until needed.

For the Pita Pockets: 
Large or mini Pita pockets, warmed --count 3 minis per person or 1 8 inch pita per person (with 3 patties for stuffing)
Chopped Iceberg or Romaine lettuce
Pickled veggies like carrots, cucumbers etc (optional)


Assembling:- 
Take a Pita pocket, stuff it with some lettuce, one or two pieces of pickled veggies and a Falafel patty. If you are using a bigger Pita or Lafa (Taboon Bread, usually served in the Middle East), you can use 3 patties.
Drizzle a tablespoonful of the yogurt sauce inside the pita but over the patties and serve immediately.
Remember to not keep the Pita and Falafel for long once you add the yogurt sauce.


Eat it as a dinner, breakfast or even as a snack. These never disappoint! Enjoy! :-)

Also see, Kashk-E-BaadamJan or Eggplant Dip, another delicious way to enjoy your Pitas with.

Sunday, March 16, 2014

Roasted Bell Pepper and Chicken Dip

They say Necessity is the Mother of all Inventions. While creating this recipe, my necessity was abundance. Ironic...right?
I had too much of these multicolored peppers from Costco and I didn't know what to make with them, as all the cooking I did up to that point involved green Bell Peppers or Green Capsicums.
Now these were sweeter, crunchier and had a sourish quality to them.
They hung out in my refrigerator that weekend and until the next weekend, when I finally decided to make something out of them. Now weekends at our home are sacred. We don't do pasta (Hubby), we don't do spicy stuff (kids) and we don't do hard-to-prepare items (Moi- coz I am the laziest person in this planet when the weekend arrives finally!)
I checked out a couple of recipes over the Internet and ruled out almost all of them because they kept on appearing with pasta recipes or some other stuff which I was in no mood to make. But what caught my attention was how many recipes asked for the Bell Peppers to be roasted and then used.
That kind of gave me the idea to this super simple recipe.
For this recipe, you can use canned chicken breast or leftover cooked chicken breast or rotisserie chicken sans the skin.


Ingredients: 
3 large bell peppers (any one of the colors pictured above will do, but I prefer red ones) - washed, seeded and cut into flat pieces as in the picture
Olive Oil and Salt - enough to drizzle and sprinkle over the bell pepper sections

1 can or 10 oz of boneless, skinless, cooked chicken breast
1 tsp garlic powder
1 tsp onion powder
1/2 cup mayonnaise
1 tsp lemon zest
1 tsp dry basil/ 4-5 leaves of fresh basil (For another yummy variation, sub Basil with Dill)
salt and pepper - to taste


Preparation:-
1. Lay the cut bell peppers (cut-side down) in a plate and drizzle olive oil over it to coat. Sprinkle some sea salt on top. Lay them flat skin side down on a cast iron skillet or lipped cookie sheet. Now you can either bake them in a 375 degree F oven or on a gas top in the skillet, for a few minutes until it resembles the image below. 


2. Now, peel the cling film-like skin from the roasted peppers and scrape off any burnt parts gently.
Add the remaining ingredients and the peeled, roasted peppers and pulse until your preferred consistency is reached. Chunky or smooth, this dip is delicious.


3. Now chill them for an hour or more before serving. You can serve them on french bread or as a dip with  crackers or use them as a sandwich filling. Possibilities are endless!


Enjoy them your way! Bon Appetite! 


Wednesday, March 5, 2014

Sabudana Jeera Bites

For Maha Shivraatri, the Hindu Festival held in reverence of Lord Shiva, I made some yummy Tapioca pearl Khichdi aka Sabudana Khichdi. Now, I shouldnt have made that delicious Kheer! My kids filled up on the dessert first and there was almost 2 cups of the delicious khichdi left. But the problem with this Khichdi is that it doesnt taste that great the next day. A self-appointed advocate for saving food and reducing wastage, I came up with this makeover, inspired by the Sabudana Vada which follows a similar recipe.
The makeover was a hit and hope you all make extra Khichdi to just try this one out.

Ingredients: Leftover Sabudana Khichdi- 1 cup (follow the link above for the recipe)
2 medium boiled potatoes.
Crushed Roasted Jeera (Cumin Seeds) and grated coconut-- to roll the balls in
salt to taste
Peanut Oil--- to fry


Method:-Mash together the potatoes and khichdi together to form a smooth-ish dough. Add salt as needed.
Form into small bite sized balls.
Roll in the grated coconut and crushed jeera mixture. Repeat with the rest of the dough.
Heat peanut oil until really hot. Try inserting a wooden spoon into the oil. It should be sending up bubbles. This is a good sign of oil getting to the required temperature. Note that if the oil isn't hot enough, the balls can disintegrate in the hot oil or absorb a lot of oil.
Now, deep fry the Jeera Bites until browned all over. When done perfectly, it should be crunchy from the outside and soft from the inside. Serve hot, with your favorite chutney.